
Now all that being said... Heidi may have forgotten to mention this season of Knock It Off to me until VERY recently ;op So instead of a glorious dress that took days to make, you are getting a simpler knock off this season. But sometimes simple is best, because my daughter is in desperate need of simple tops to go with the variety of skirts and shorts that have been passed down to her for summer.
So today I am going to show you how to knock off this Asymmetrical Ruffle Top from Gap.
theirs: $14.95

mine: $0

isn't it cute!
I started with the new Leilani Ruffle Top by Funktional Threads as my pattern
First I grabbed a women's white tank from my stash (when I do this again, I willpick a knit with a touch of lycra or spandex - or maybe just a higher quality cotton... this is straight cotton T)
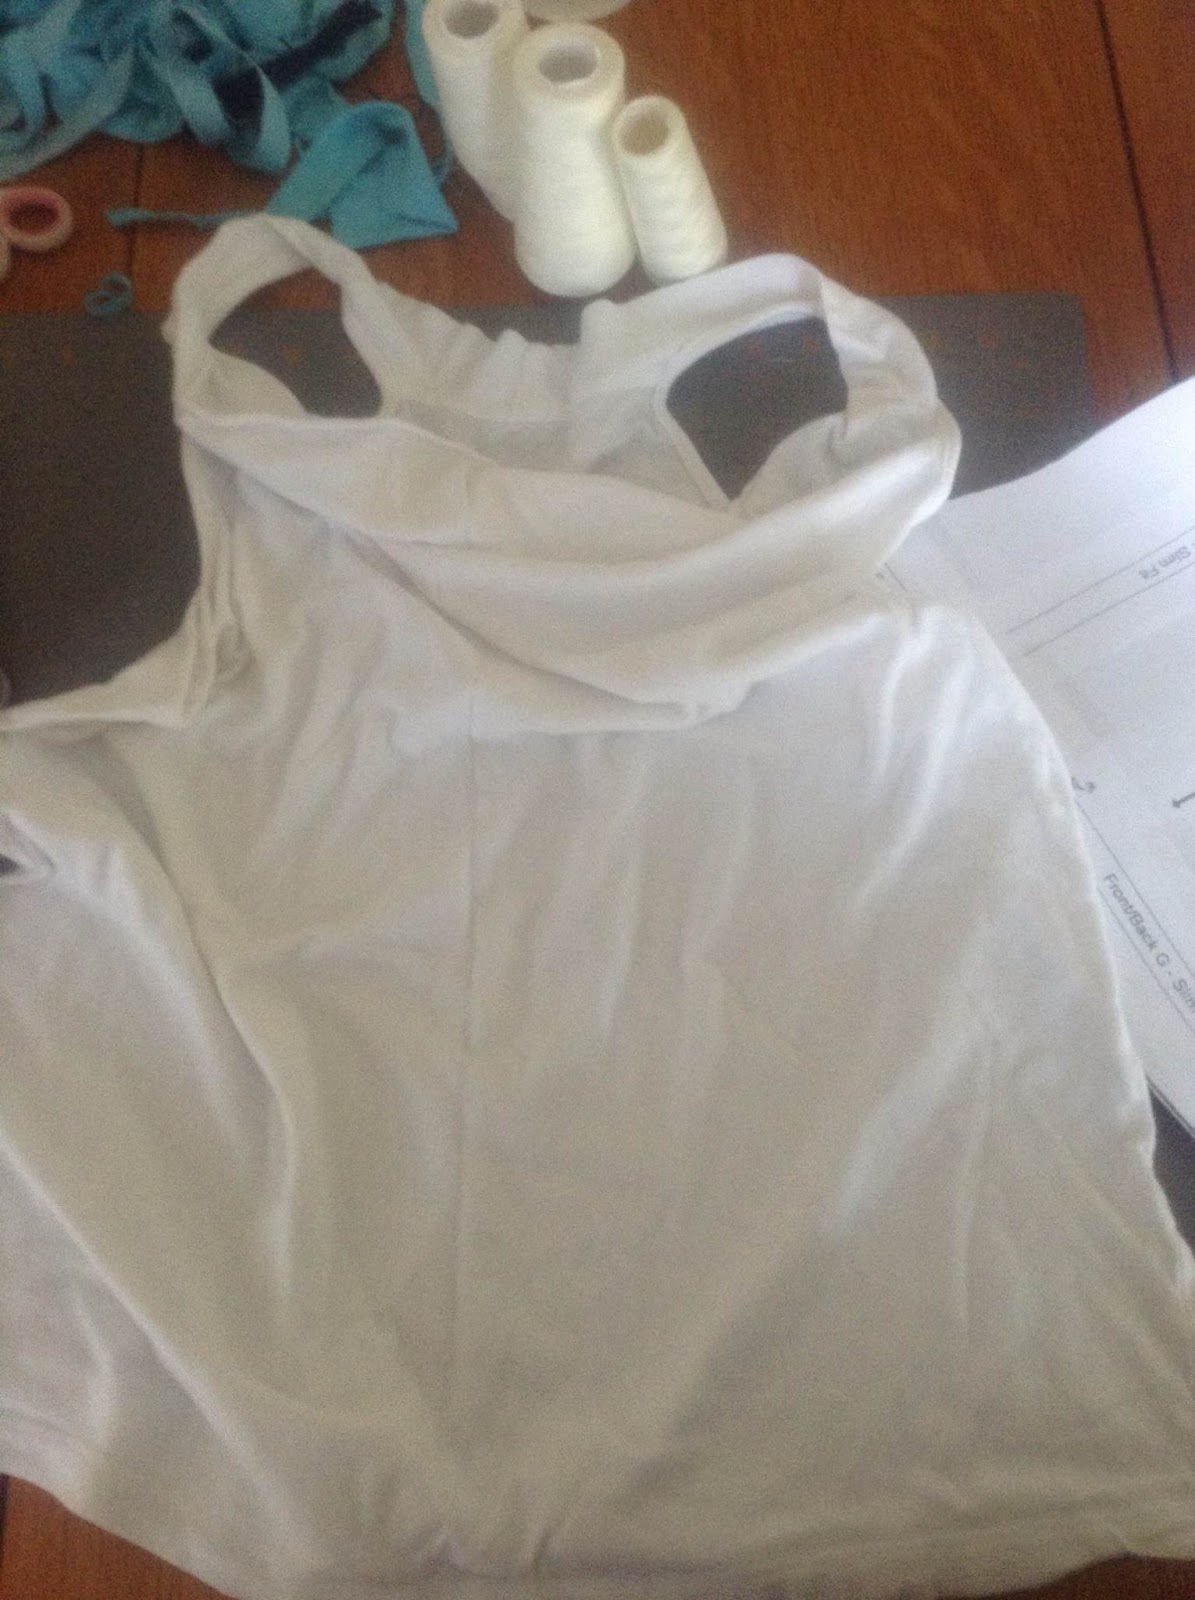
Next, I laid my main body section on the T - I measured up 2 inches so that there would be plenty of room for the flounce. Using the existing hem is just a time saving perk of upcycling ;o)

Then I cut a straight line from the arm hole corner to the bottom edge of the pattern piece and continued it to the hem of the T. This will give the top the flowy loose fit it needs to match the Gap top. If you want a little more fit, follow the original line of the pattern!

Here are the pattern pieces you will need to cut:
-Body, front and back
-Bottom Flounce (this will be used a the neckline)
*I cut this in two peices since I was upcycling
-Arm Hole Facing
-Strap
-Curved Strap (not pictured)

Follow the instructions to attach your curved strap, the side seams, and the arm hole facing.
Attach your strap to the INSIDE of the bodice (this is opposite of the pattern directions)


Gather your bottom flounce to match the circumference of your neckline. Attach your Ruffle to the INSIDE of your bodice, pin and Baste in place. Make sure your strap is laying down like the picture above.

Flip your ruffle over to the front and top stitch.
*When I make this again I will run a thin 1/4 inch elastic through the neckline - or use two rows of shirring to give the neckline a bit more stabilization and memory.

Cut a length of elastic 2 inches less than your child's waist measurement - or exactly their measurement if you want a looser fit. Sew into a loop (I used super soft underwear elastic)

Mark your elastic placement - I did 3.5inches up from the hem. This will be the amount you have hanging below the elastic waist.

Pin the elastic in place.

Sew along both the top and bottom of the elastic - stretching the elastic as you sew. I use a nice long stitch for this.

This is how it will look from the outside

***I did debate making a casing, but honestly didn't have a long enough section left of my upcycle, you could certainly do that if you didn't want elastic touching baby's skin.
And you have a finished top!!!

*One note - the Original has a rolled hem on the Ruffle. I would have done this, but forgot to add length when cutting my piece. If you want to finish this edge, add .5 inch to your bottom ruffle piece when cutting. The great thing about knit is that it wont unravel ;o)
*This is actually the shirt after being washed, I put it on her the night before to take pictures at a cute park, got to the park and realized I forgot my camera ;op Oooops, by the time we got home is was dirty.


Tip toe through the tulips ;o)
Hugs, and keep on sewing for the itty bitty loves in your life!
Oh, Suzanne! Where have I been? Your little lady is turning into such a big girl! I love this knock off. So adorable. I also love your blog's new look (If it's not new, you know I have "busy mama" syndrome!) Missin' our PR&P convos!!!
ReplyDeleteSHANNON - I have missed you soooooooooooooooooooooooooo much!!!! The look is new as of yesterday ;o) Huge hugs... life is crazy and I miss your ray of sunshine and serenity in the midst of it all!
DeleteThis is adorable!!
ReplyDeleteSo cute! Great job!
ReplyDeleteWonderful, Suzanne! I think this is the best fitting one shoulder ruffle neck top I've seen. I would have thought you had added elastic to the neckline, but it really fits your daughter perfectly without it. Great knock-off!
ReplyDeleteVery cute! Great job!!!
ReplyDeleteWow, quite the knock off! It fits her beautifully, I love the white and yellow (and tulips!), it feels so Spring-y.
ReplyDeleteGreat way to get us started! Thanks for the tutorial!
ReplyDeleteWhat a great shirt. I love it! I think I may have to buy that pattern now ;) Thanks for the wonderful inspiration!
ReplyDeleteLove it! And I actually like the little frayed look on the ruffle after the washing.
ReplyDeleteLove it! This is so cute and those pictures are so wonderful too. You're damned talented!!! <3
ReplyDeleteGreat top!
ReplyDeleteThis does not look like it has been made in a rush. Beautiful! And love the photos with the tulips. Knock it Off was my first series too ;-)
ReplyDeleteOh, the top is so cute! and your photos are beautiful :)
ReplyDeleteDarling!! :) Love the pictures! :) I just finished a skirt for my daughter but she managed to get it dirty before I could get a picture of it. Hopefully it'll look as good as yours after washing. :)
ReplyDeleteAmazing knock off! You did great... are you sure you didn't buy that top?! HA! That's how awesome it is!!!
ReplyDeleteSo awesome!!! I love love this. It's going to be winter soon, but after that I will make this for Eddie :D :D
ReplyDeleteSo so adorable!!! Gah, I love it!
ReplyDeleteI absolutely love this! Do you get royalties from the Leilani pattern 'cause I'm about to go buy it and copy your tutorial to make my own crazy freakin' cute shirt!
ReplyDelete